Linking Users to Projects
The platform features a native security model. Based on a user's identity, once the user has been authenticated by the login provider, the platform allows a user to be associated to an existing project.
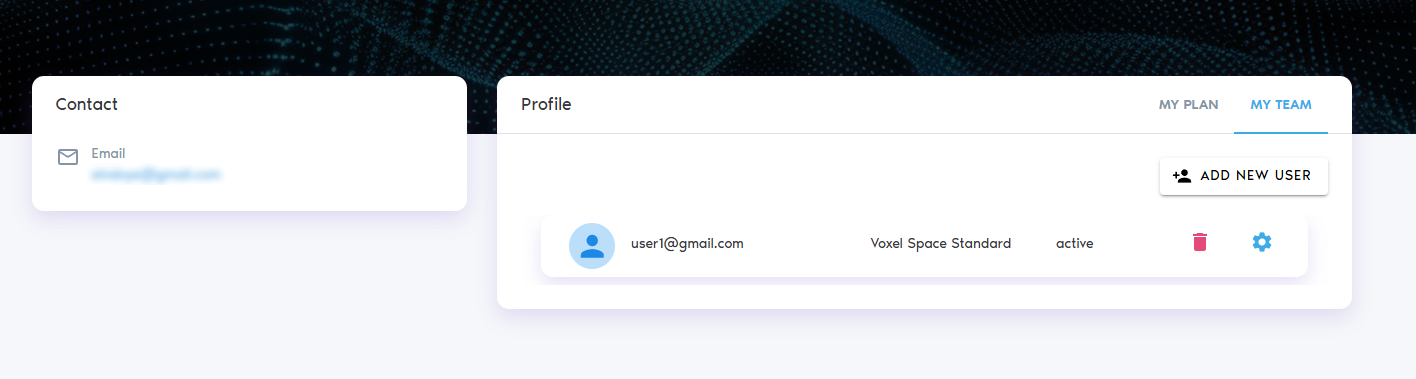
To add a user to a project, go to your user profile and click on profile
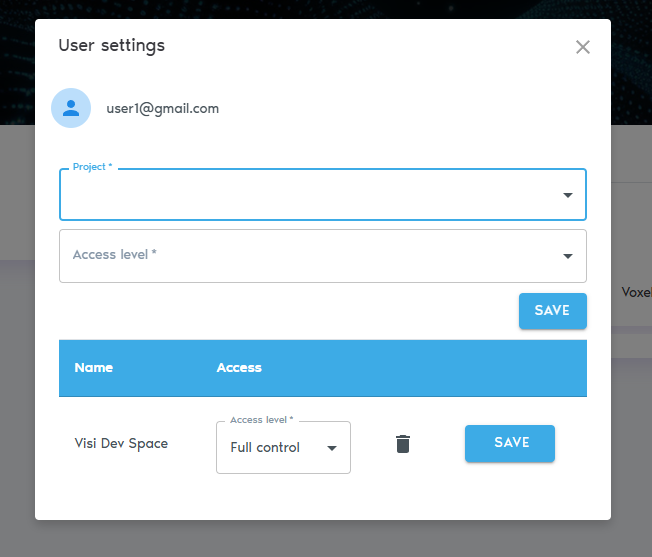
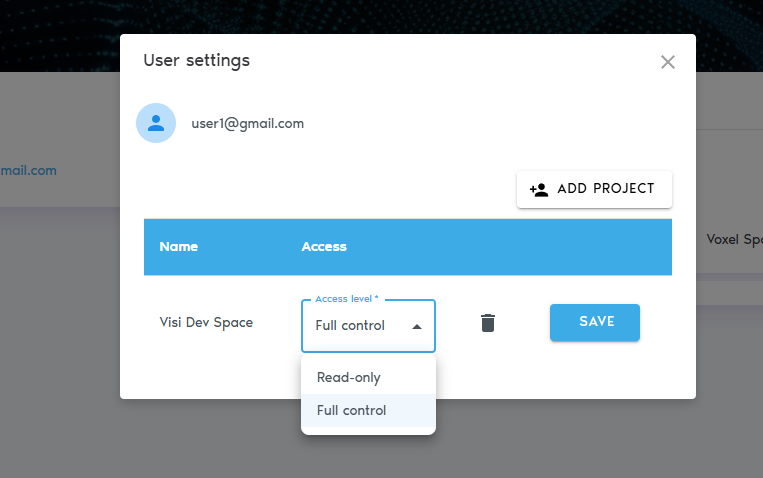
To assign a project to a user, you need to create the user first by clicking on "Add New User" from the "My Team" tab. Once the user created, click on the user settings button to assign a project with the desired access level:
Click on "Add project" to assign a project to a user
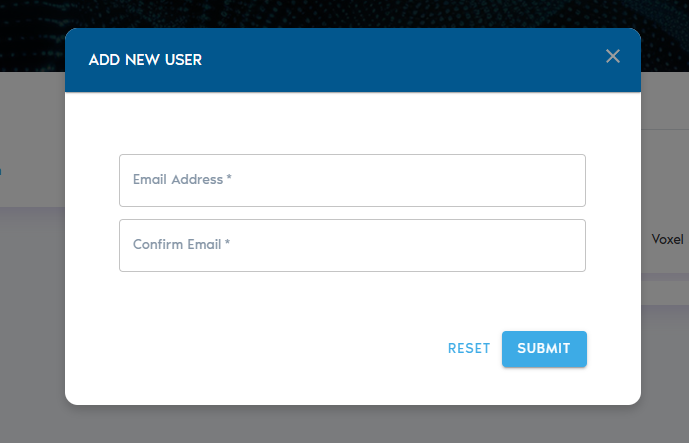
Next, click on the "Add User..." button. This will show a dialog prompting for an email. The user will receive an invitation email.
In the "User ID" field you must provide the identifier for the desired user. This identifier could be the user's email, or a different handle, depending on how identity is managed by the login system. If not sure about which ID to use, please contact your network administrator.
The "Access Level" field allows to pick one of the two possible access levels:
- Read-Only: The user can view and read data, but cannot add new data or change the existing data in any way. The user will not be able to add other users to the project, nor to change the access level of existing users.
- Full Control: The user is allowed to perform all operations
It is possible to change the access level of a User later, by clicking on the settings icon, and then selecting the "Access Level".
To remove a User from a project, open the context menu and select "Remove from Project".
No Comments