Working with Projects
Introduction
Working with Projects
The Voxel Farm platform uses a data-centric approach to allow organizations scale the spatial understanding of their operations.
A data-centric approach creates a shared repository of spatial objects. The platform calls these spatial objects "Entities". Some Entity examples are:
- Point Clouds
- Terrain Models
- Block Models
- Planning / Design Solids
- BIM
The platform allows these entities to be shared -as long as security settings allow- within different teams across the organization.
A typical organization may produce hundreds of thousands of different entities every year. Some entities will be authored by professionals in the organization, some will be raw dataset captures and some will be the result of processing other spatial entities. The total collection of entities is known as the Organization's Catalog.
In order to manage the sheer number of entities, the platform structures the full Organization's Catalog in a hierarchy of Projects and Folders. It is up to the teams in the organization to come up with which Projects should be used, who will be assigned to each Project, what folder structure should be user in each particular Project, and which Entities will appear in the project.
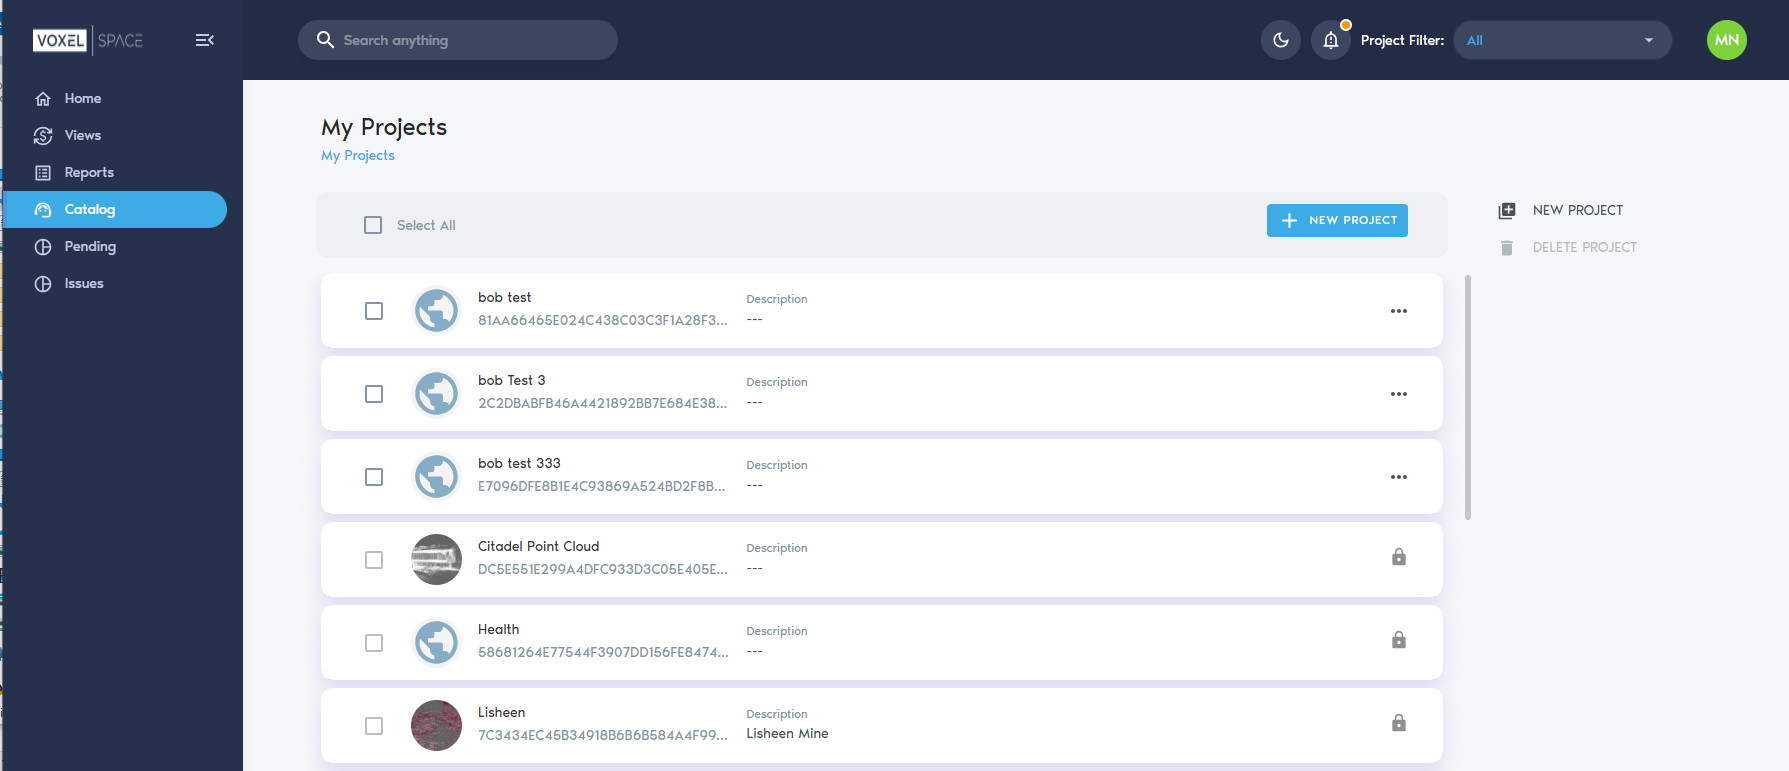
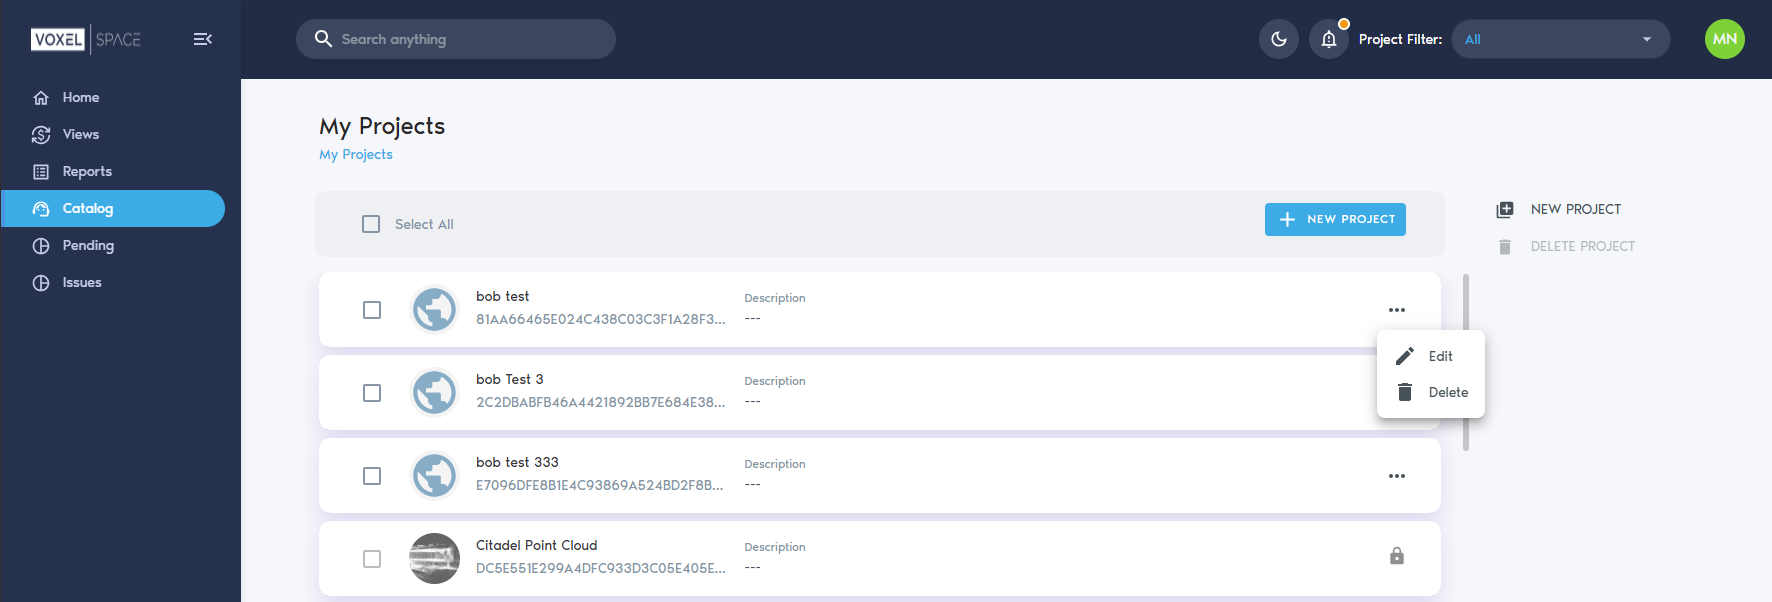
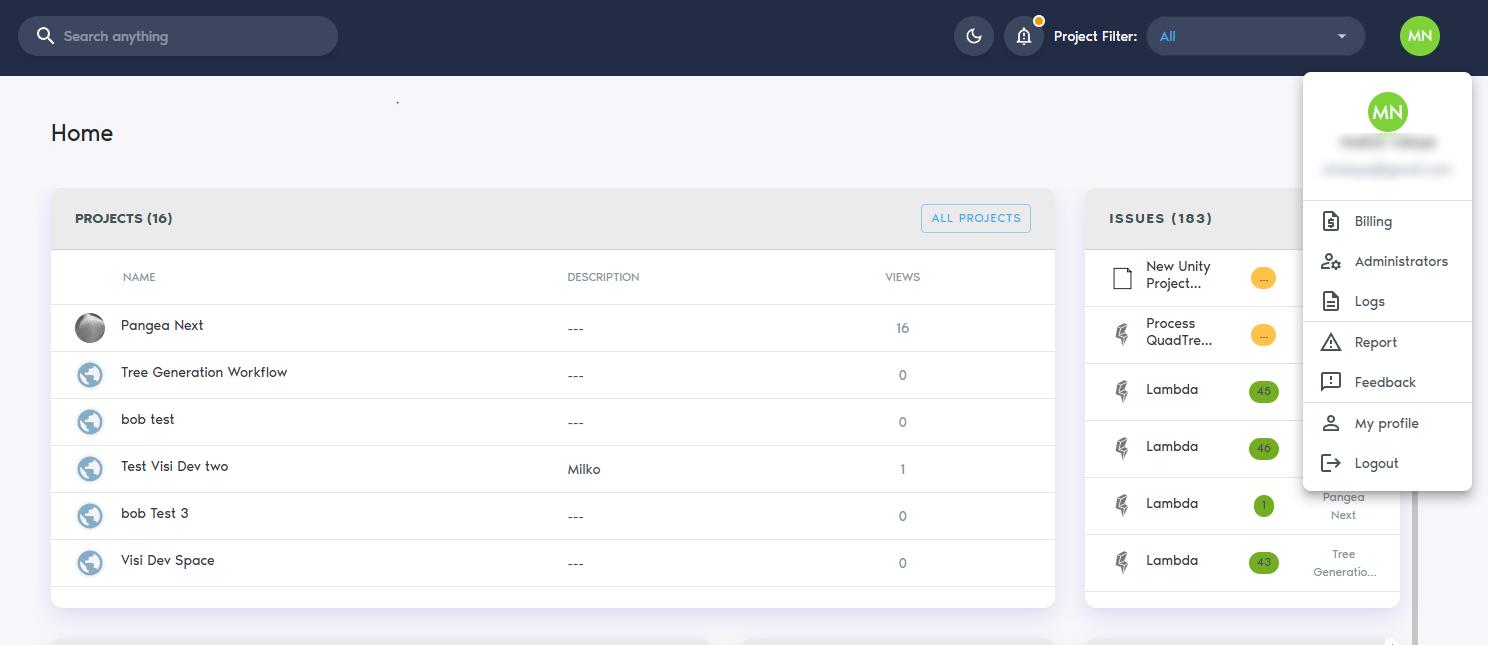
After a successful login, a User can click on the "Catalog" section of the UI. This will display a list of the projects the user can access:
To select a particular Project, the user may click on the project. This will load the page for the Project in the browser.
The Project contains a catalog of Entities, which the user can access . This reveals the folder structure of the Project and allows the user to see how the different Entities in the project have been organized by the project's team members:
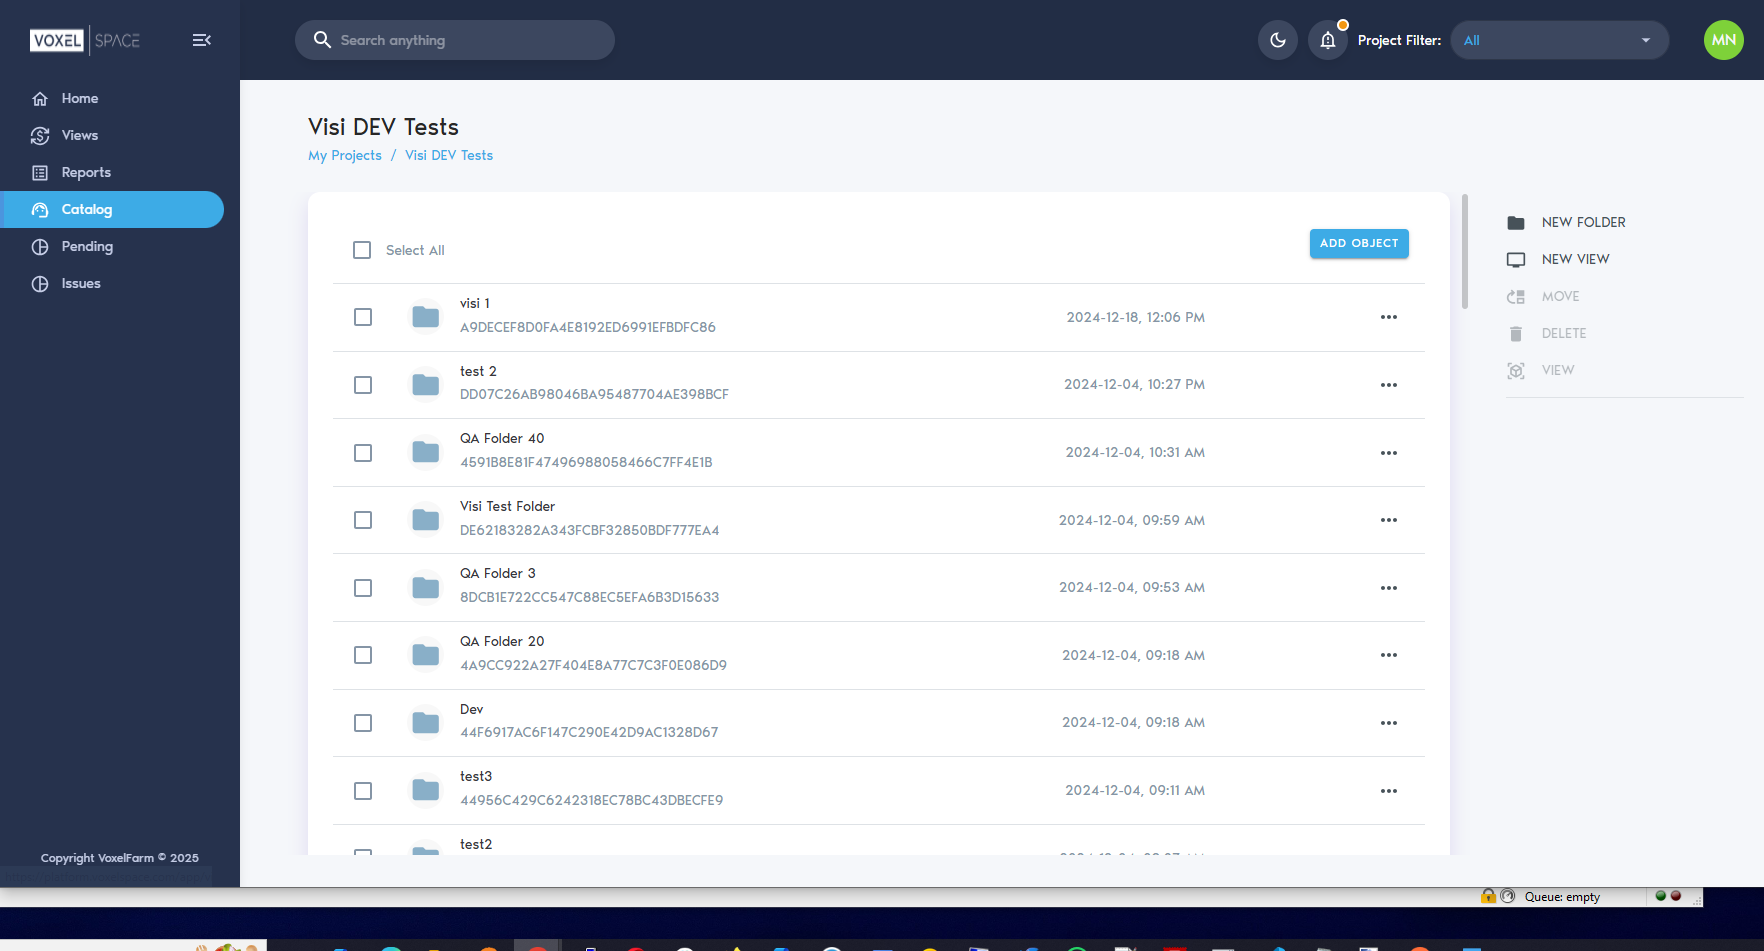
The User may click on the "New Folder" button to create a new Folder in the Catalog.
Creating a Project
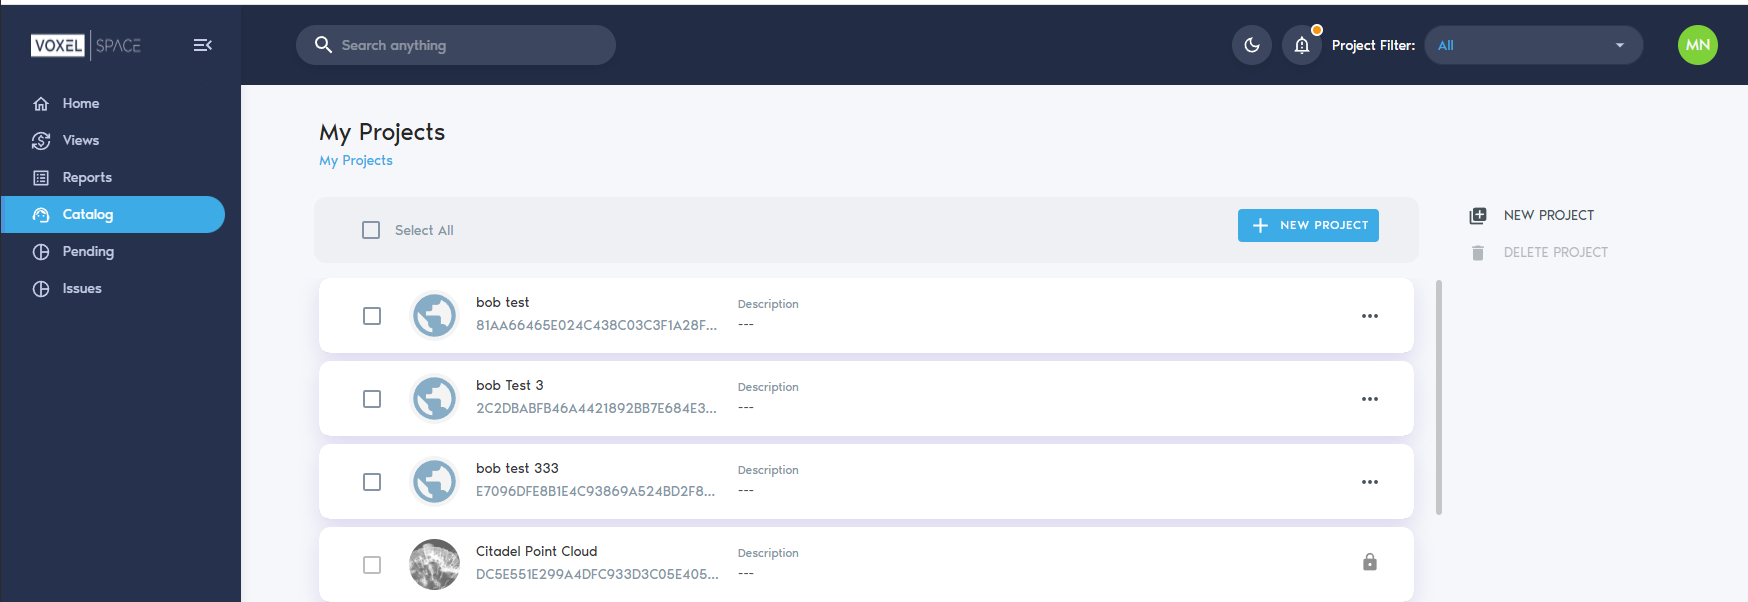
To create a Project, go to the "Catalog" section. This will display the list of projects currently assigned to your user account.
Next, click on the "New Project" button, that displays first in the project list:
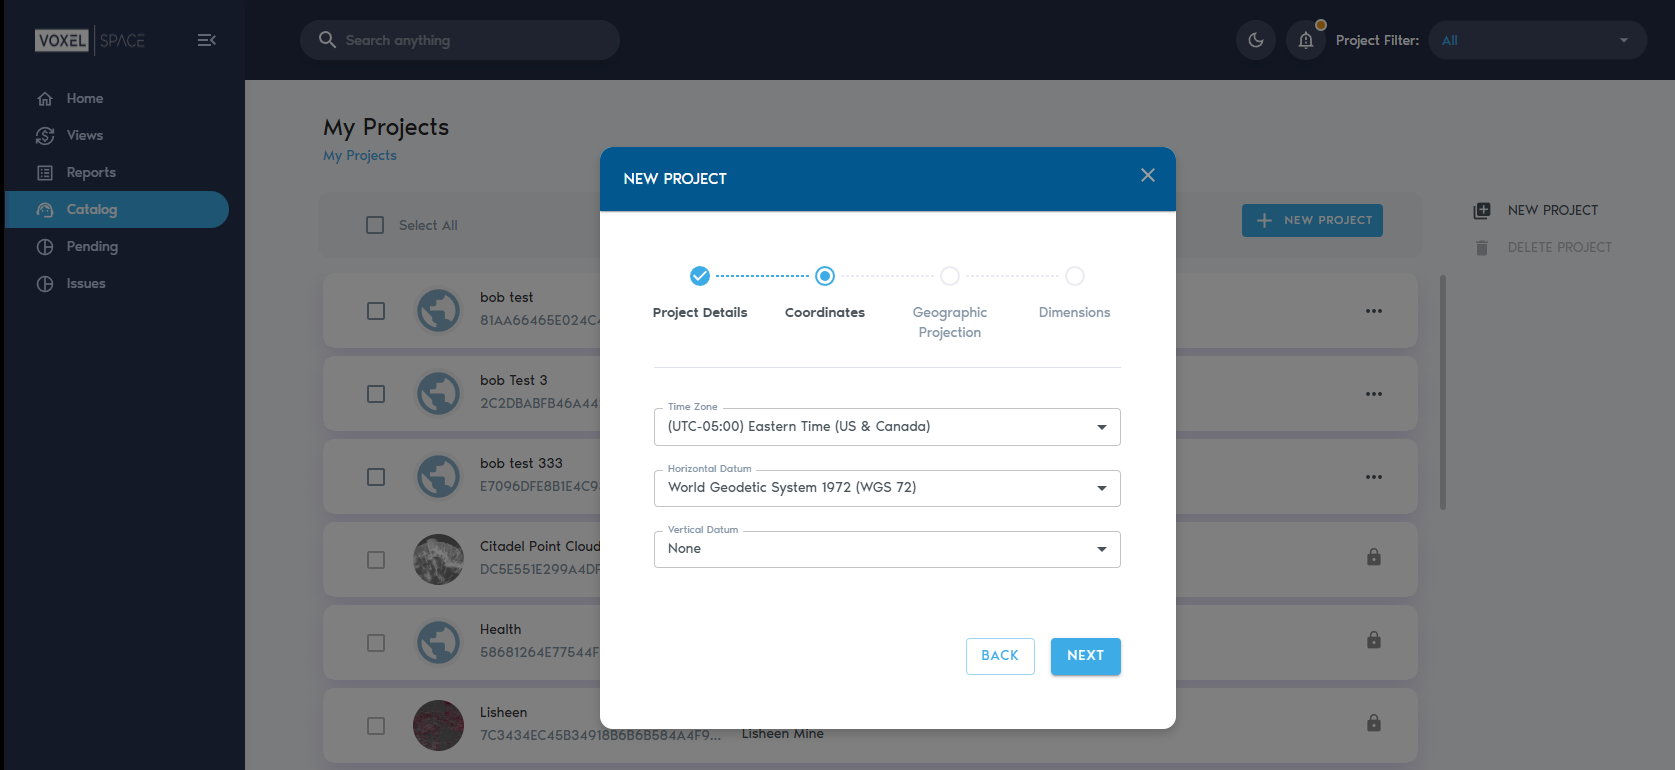
This will show a modal dialog prompting for information about the new Project:
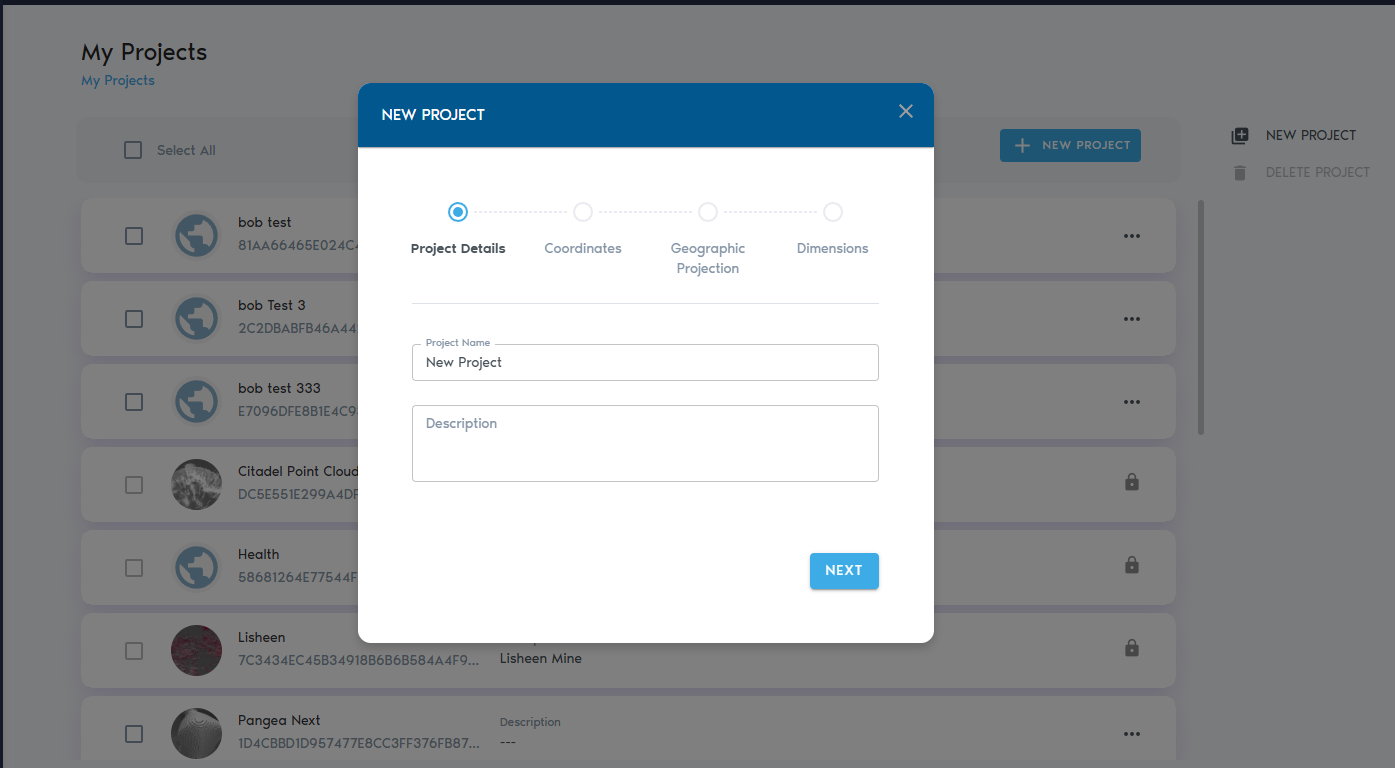
Here, provide a name and description to the Project.
The remaining properties are about the Project's coordinate system. Please check the Project Coordinate System section for more information about these properties.
Click on the "Create" button to create the Project. Once the Project is created, the UI will load it automatically, placing you in the Project Catalog section:
Project Setup
To modify Project settings, first go to the catalog and click on three-dot menu of your project and select Edit:
I

Project Coordinate System
Use the “Coordinates” section to configure the units and projection system used by the project.
The following table lists the properties found in the Coordinates section and describes their use:
|
Time Zone |
The time zone for the project’s location. |
|
Horizontal datum |
Horizontal datum used by the project. These are the supported horizontal datums:
|
|
Vertical datum |
Vertical datum used by the project. These are the supported vertical datums:
|
|
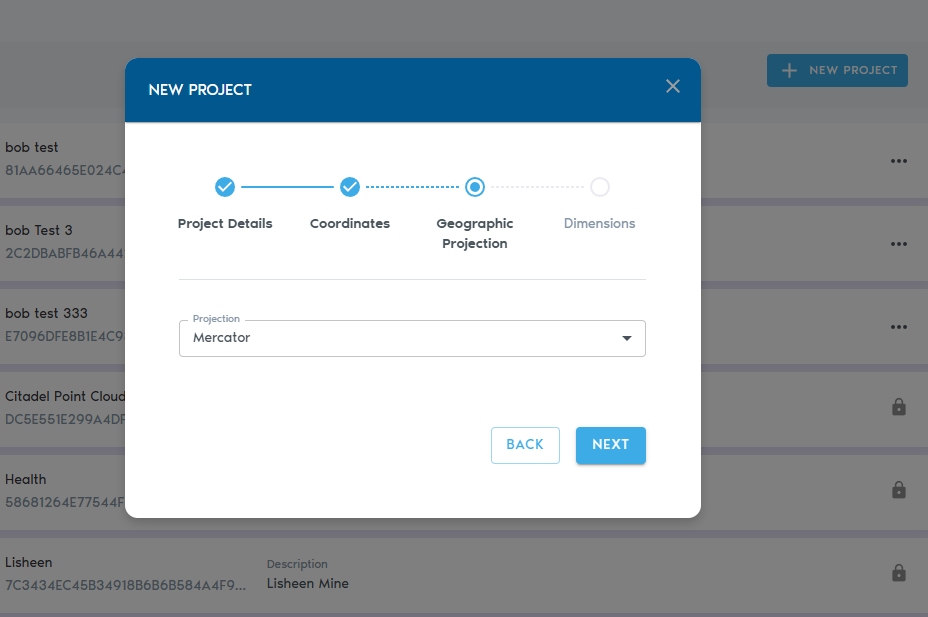
Projection |
Projection used by the project. These are the supported projections:
|
|
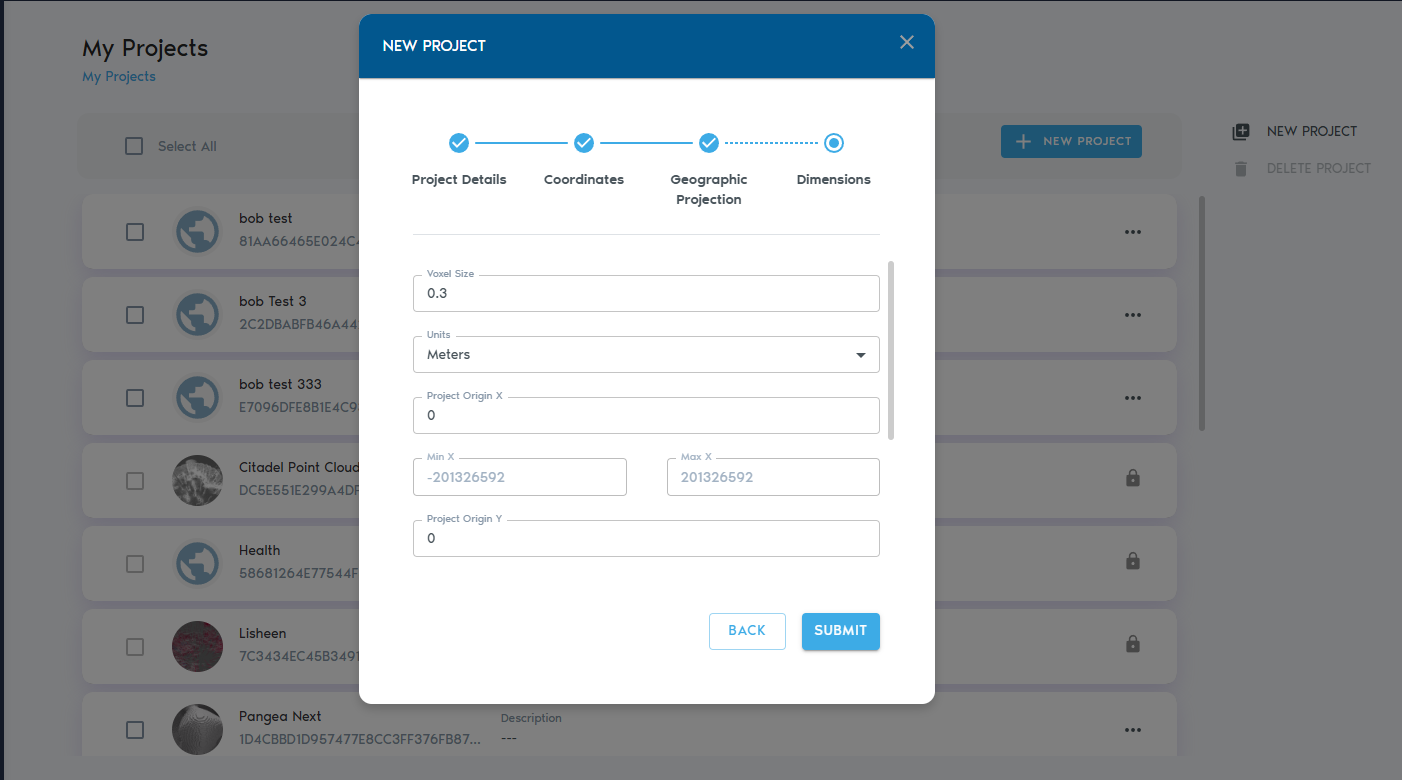
Units |
Determines whether units represent meters of feet. |
|
Voxel Size |
Voxels are cubes. This parameter determines the length all sides in a voxel’s cube. |
|
Project Origin X, Y, Z |
The origin coordinates of the project, in units. This point becomes a reference point for the project. |
|
Min X, Y, Z (read-only) |
Minimum possible coordinates in the project. |
|
Max X, Y, Z (read-only) |
Maximum possible coordinates in the project. |
The next page is about the geographic Projection
Click on next to add the dimensions of your project
Linking Users to Projects
The platform features a native security model. Based on a user's identity, once the user has been authenticated by the login provider, the platform allows a user to be associated to an existing project.
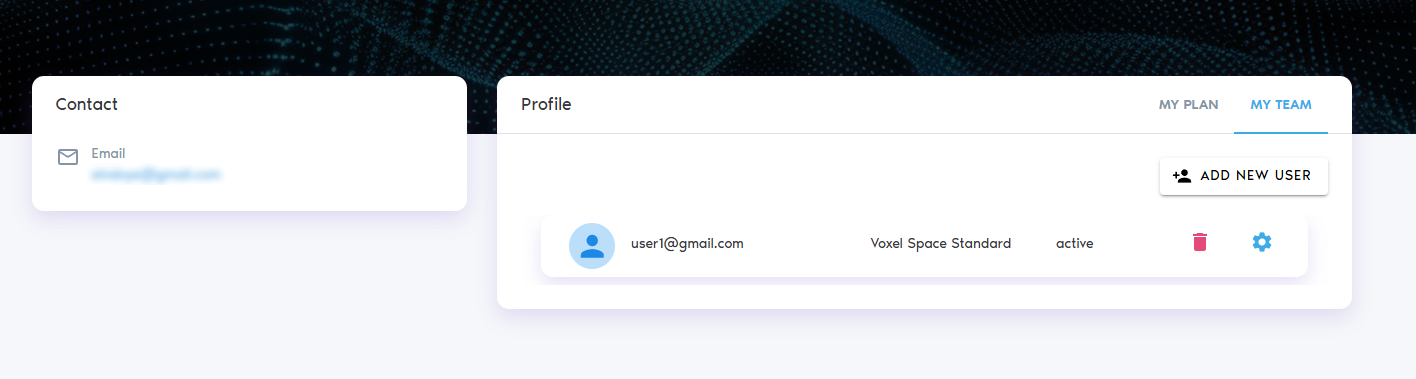
To add a user to a project, go to your user profile and click on profile
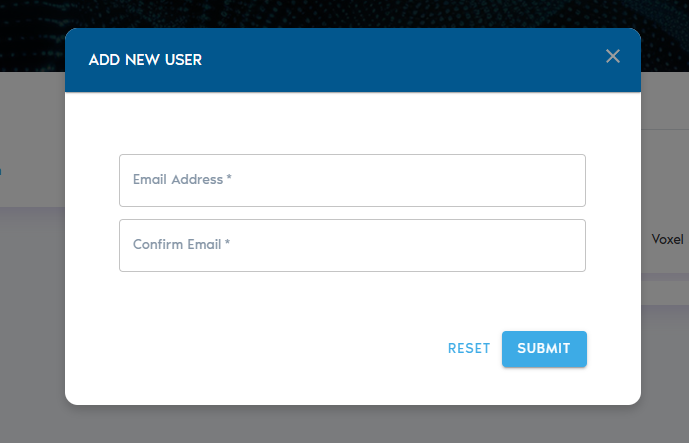
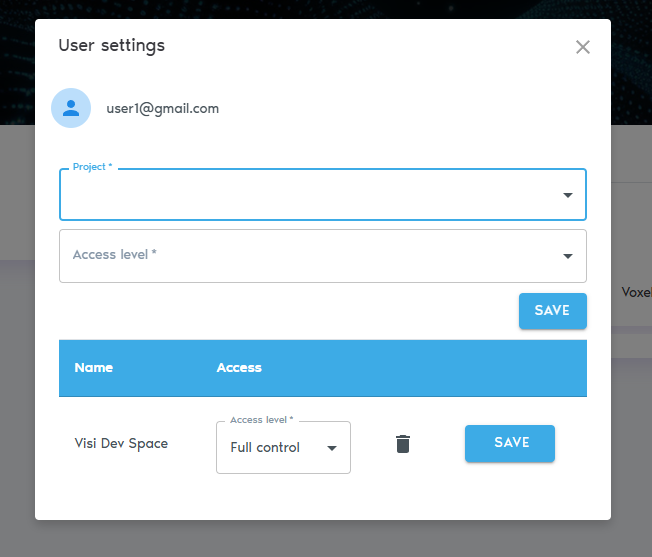
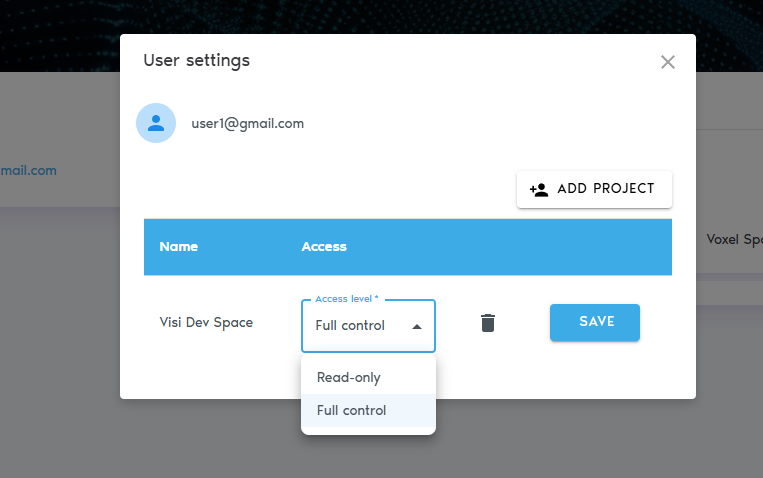
To assign a project to a user, you need to create the user first by clicking on "Add New User" from the "My Team" tab. Once the user created, click on the user settings button to assign a project with the desired access level:
Click on "Add project" to assign a project to a user
Next, click on the "Add User..." button. This will show a dialog prompting for an email. The user will receive an invitation email.
In the "User ID" field you must provide the identifier for the desired user. This identifier could be the user's email, or a different handle, depending on how identity is managed by the login system. If not sure about which ID to use, please contact your network administrator.
The "Access Level" field allows to pick one of the two possible access levels:
- Read-Only: The user can view and read data, but cannot add new data or change the existing data in any way. The user will not be able to add other users to the project, nor to change the access level of existing users.
- Full Control: The user is allowed to perform all operations
It is possible to change the access level of a User later, by clicking on the settings icon, and then selecting the "Access Level".
To remove a User from a project, open the context menu and select "Remove from Project".