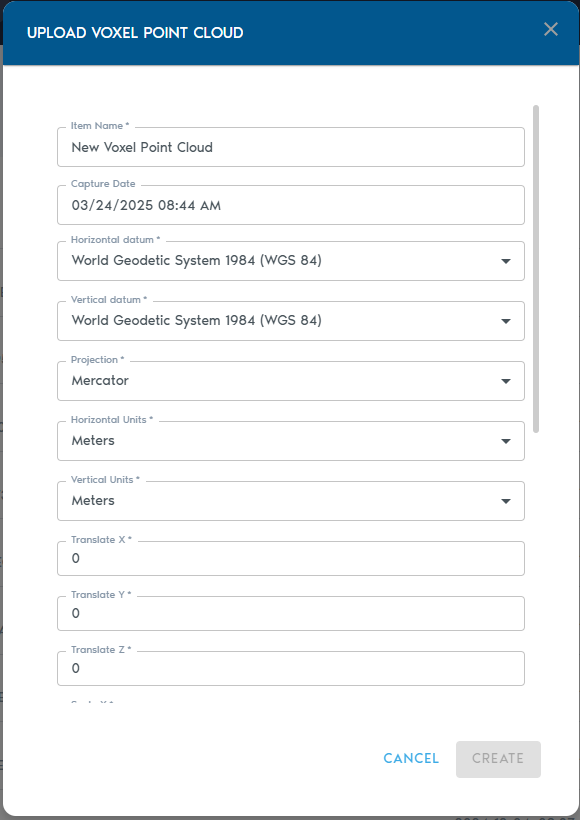
| Item Name | A readable name for the new entity |
| Capture Date | An optional field containing the original capture date |
| Horizontal Datum | Horizontal datum used in the point cloud |
| Vertical Datum | Vertical datum used in the point cloud |
| Projection | Projection used by the point cloud |
| Horizontal Units | Horizontal unit type used in the point cloud |
| Vertical Units | Vertical unit type used in the point cloud |
| Item Name | A readable name for the new entity |
| Capture Date | An optional field containing the original capture date |
| Horizontal Datum | The horizontal datum used in the world registration files |
| Projection | The projection used by the world registration files |
| Horizontal Units | The horizontal unit type used in the world registration files |
| Image Format Extension | Expected World File Extension |
| .JPG | .JGW |
| .PNG | .PGW |
| .BMP | .BPW |
| .TGA | .TAW |
| .TIF | .TFW |
| Item Name | A readable name for the new entity |
| Minimum Height | Elevation value for black pixels in the heightmap |
| Maximum Height | Elevation value for white pixels in the heightmap |
| Capture Device | An optional string to identify capture device |
| Capture Date | An optional field containing the original capture date |
| Horizontal Datum | The horizontal datum used in the heightmap |
| Vertical Datum | The vertical datum used in the heightmap |
| Projection | The projection used by the heightmap |
| Horizontal Units | The horizontal unit type used in the heightmap |
| Vertical Units | The vertical unit type used in the heightmap |
| Image Format Extension | Expected World File Extension |
| .PNG (16bit grayscale) | .PGW |
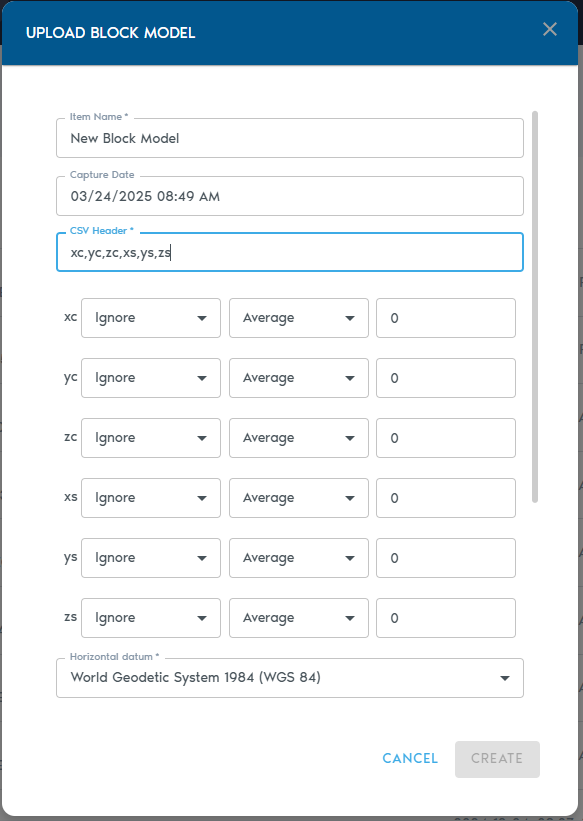
| Item Name | A readable name for the new entity |
| Capture Date | An optional field containing the original capture date |
| CSV Header | See the paragraph following this table for an explanation of what CSV Header does. |
| Horizontal Datum | The horizontal datum used in the block model |
| Vertical Datum | The vertical datum used in the block model |
| Projection | The projection used by the block model |
| Horizontal Units | The horizontal unit type used in the block model |
| Vertical Units | The vertical unit type used in the block model |
| [](https://help.mystart.com/uploads/images/gallery/2025-03/WvSimage.png) | [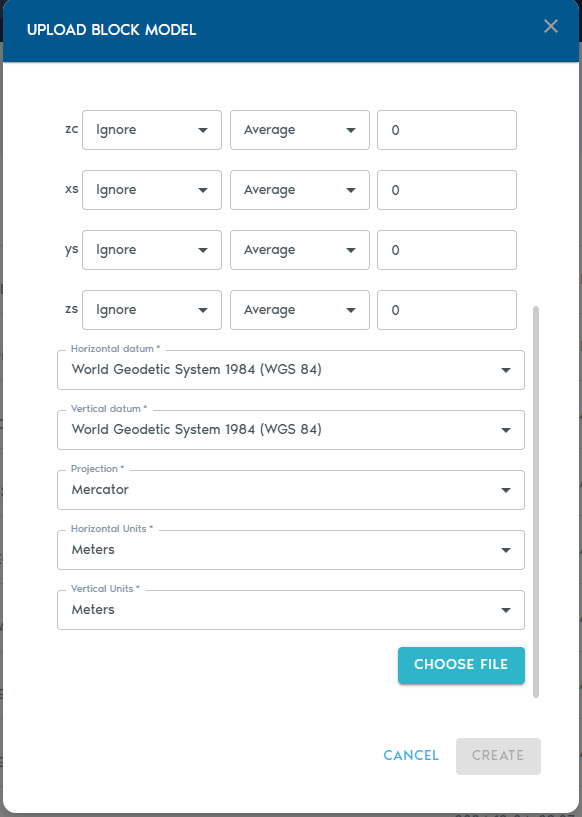](https://help.mystart.com/uploads/images/gallery/2025-03/fkFimage.png) |
| Ignore | Skip this column when processing the block model |
| Set | The values in this column belong to a set with a limited number of elements that appear many times over in the block model. |
| Value | The values in this column will be interpreted as numbers. This setting should be used for grades and any other numeric quantity. |
| Block Centroid X | X coordinate of the block’s centroid |
| Block Centroid Y | Y coordinate of the block’s centroid |
| Block Centroid Z | Z coordinate of the block’s centroid |
| Block Origin X | X coordinate of the block’s origin |
| Block Origin Y | Y coordinate of the block’s origin |
| Block Origin Z | Z coordinate of the block’s origin |
| Block Dimension X | Block’s dimension along the X axis |
| Block Dimension Y | Block’s dimension along the Y axis |
| Block Dimension Z | Block’s dimension along the Z axis |
| Average | Higher frequency data is averaged to produce lower frequency data |
| Min | Lower frequency data is set to the minimum value of the local higher frequency data |
| Max | Lower frequency data is set to the maximum value of the local higher frequency data |
| Add | Lower frequency data is the sum of the high frequency data. This works well for columns that represent counters. |
| Multiply | Lower frequency data is the multiplication of the high frequency data. |
| Item Name | A readable name for the new entity |
| Capture Date | An optional field containing the original capture date |
| Horizontal Datum | Horizontal datum used in the point cloud |
| Vertical Datum | Vertical datum used in the point cloud |
| Projection | Projection used by the point cloud |
| Horizontal Units | Horizontal unit type used in the point cloud |
| Vertical Units | Vertical unit type used in the point cloud |
| Item Name | A readable name for the new entity |
| Source Mesh | Shows a list of available raw Mesh entities. From this list, you can select which raw Mesh will be used to create the Indexed Mesh. |
| Translate XYZ | These fields allow translating the mesh position by the specified amounts along each coordinate axis |
| Scale XYZ | These fields allow scaling the mesh by the specified amounts along each coordinate axis. A value of 1.0 represents the original scale |
| Rotate XYZ | Euler rotation angles for each coordinate axis. |
| Rotation Order | Euler rotation angle sequence. |
| Item Name | A readable name for the new entity |
| Source Mesh | Shows a lists of available raw Point Cloud entities. From this list, you can select which raw Point Cloud will be used to create the Indexed Point Cloud. |
| [](https://help.mystart.com/uploads/images/gallery/2025-03/hBgimage.png) | [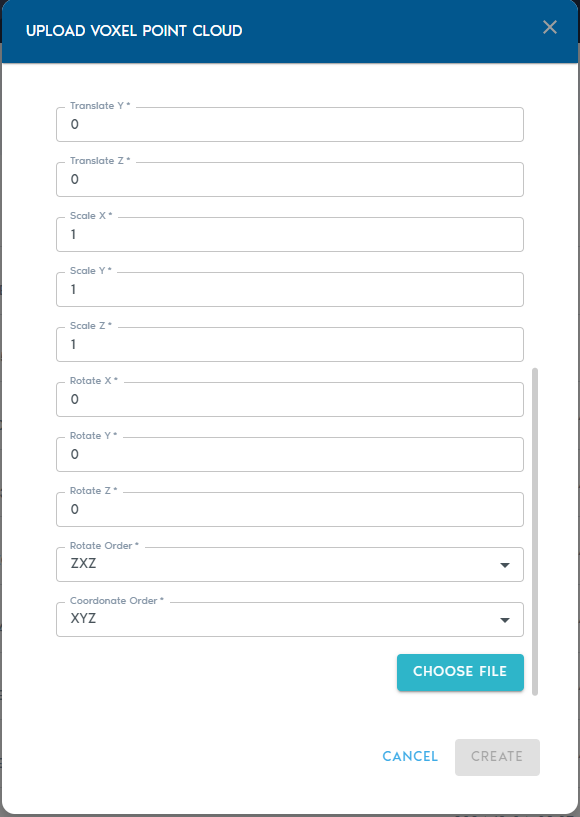](https://help.mystart.com/uploads/images/gallery/2025-03/VB3image.png) |
| Item Name | A readable name for the new entity |
| Capture Device | An optional string to identify capture device |
| Capture Date | An optional field containing the original capture date |
| Horizontal Datum | Horizontal datum used in the point cloud |
| Vertical Datum | Vertical datum used in the point cloud |
| Projection | Projection used by the point cloud |
| Horizontal Units | Horizontal unit type used in the point cloud |
| Vertical Units | Vertical unit type used in the point cloud |
| Translate XYZ | These fields allow translating the mesh position by the specified amounts along each coordinate axis |
| Scale XYZ | These fields allow scaling the mesh by the specified amounts along each coordinate axis. A value of 1.0 represents the original scale |
| Rotate XYZ | Euler rotation angles for each coordinate axis. |
| Rotation Order | Euler rotation angle sequence. |
| Item Name | A readable name for the new entity |
| Source | Shows a list of available raw Point Cloud and Heightmap entities. From this list, you can select which entity will be used to construct the Voxel Terrain. It is possible to select more than one entity here. |
| Include | Allows to select which point classes should be used. By default, all points will be used to construct the terrain. This setting is used only when the source is a Point Cloud. |
| Ortho-Imagery | Shows a list of available Ortho-Imagery entities. If an Ortho-Imagery entity is provided, it will be processed into the Voxel Terrain dataset and later it can be visualized on top of the Voxel Terrain surface. It is possible to select more than one entity here. |
| Detail Recovery – Use point cloud colors | Applicable when creating a Voxel Terrain from a raw point cloud that contains RGB color information per point. If this option is checked, the import process will create an ortho-imagery set on-the-fly using point colors and it will apply it to the Voxel Terrain. |
| Detail Recovery – Generate terrain normals | Requests the import system to create another Ortho-Imagery set associated with the Voxel Terrain. This set will contain high-frequency elevation detail captured as a normal map. |
| [](https://help.mystart.com/uploads/images/gallery/2025-03/uYVimage.png) | [](https://help.mystart.com/uploads/images/gallery/2025-03/WYMimage.png) |
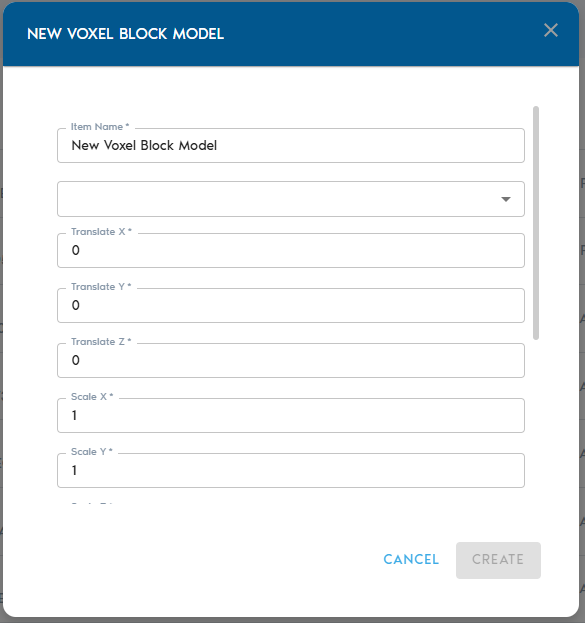
| Item Name | A readable name for the new entity |
| Source | Shows a lists of available raw Block Model entities. From this list, you can select which raw Block Model will be used to create the Voxelized Block Model. |
| Translate XYZ | These fields allow translating the mesh position by the specified amounts along each coordinate axis |
| Scale XYZ | These fields allow scaling the mesh by the specified amounts along each coordinate axis. A value of 1.0 represents the original scale |
| Rotate XYZ | Euler rotation angles for each coordinate axis. |
| Rotation Order | Euler rotation angle sequence. |
| Name | A readable name for the new entity |
| Source | Shows a list of available Program entities. From this list, you can select which Program will be used by Voxel Generator. |
| Program Name | A readable name for the new entity |
| Type | Type of Program. Can be set to “Voxel Generator”, “Report” or “View” |
| Code | Python code for the Program Entity. |
| File Name | A readable name for the new entity, will also be used as file name when the results are downloaded to a local machine |
| Region | Select one of the regions available in the Project as the scope where the Report will run. Visit the [Working with Regions](https://demo.voxelfarm.com/help/WorkingwithRegions.html) section to see how to define a new region. |
| Type | Select one of the following available types of data to export: - Mesh - Exports a surface as an OBJ mesh file - Points - Export a point cloud using CSV - Raster - Exports ortho-imagery using TIFF and TFW |
| Resolution | Depending on which type was selected, the export operation allows to export data at 1:1 density, or it can produce lower resolutions of the data. |
| Source | Depending on which type of export operation was selected, this component allows to select the dataset that will provide the information to be exported |